Woman using nail gun to install cabinet crown molding.

How to Install Crown Molding On Cabinets

Crown molding on cabinets does one thing better than almost any other finishing detail, for real.

It helps a kitchen look intentional, not like it just kinda ended at the ceiling line.

Without it, your cabinets end up being more or less boxes that stop short and then… there’s that awkward gap. With crown, the whole setup reads like built-in furniture. The weird space above the cabinets basically fades away, and the room feels finished in a way that is honestly hard to put into words until you actually see it done right.

Installing crown molding on cabinets is a job that most folks can do on their own, honestly. It really needs patience, a decent miter saw, and, you know, that habit of measuring twice before you commit to any cut. If you’ve been sitting there thinking about how to install crown molding on kitchen cabinets so it doesn’t look amateurish, then this little guide shows you the whole thing, from the planning part all the way up to the final caulk, little by little.

What You Need Before You Start

Tools and materials for crown molding installation on cabinets.

Get everything together before you touch a single piece of molding. Running to the hardware store mid-project breaks your focus and usually leads to mistakes that cost more time than the trip itself.

Tools and materials:

  • Miter saw with a fine-tooth blade for clean cuts
  • Brad nailer loaded with 2-inch 18-gauge finish nails
  • Wood glue for corner joints and anywhere two pieces of molding meet
  • Stud finder to locate wall studs behind the upper cabinets
  • Caulk and a caulk gun for gaps at the ceiling line and along the face frame
  • Tape measure, pencil, and a reliable level
  • Scrap pieces of molding for practicing cuts before you touch the real stock

On nail sizing, 2-inch 18-gauge brad nails work well for most crown molding on cabinets installations. At outside corners where two molding pieces meet, use something slightly shorter so you do not blow through the face of the molding.

Build a Nailing Strip Before Anything Else

Build a Nailing Strip Before Anything Else

This is the step most DIY guides skip. It is also the step that makes everything else work properly.

A lot of people ask do you nail crown molding directly to cabinets. The answer is no, not if you want it to stay put. The top of a cabinet does not have enough material to hold nails reliably over time. Without something solid behind it the molding will flex, pop loose, or crack at the joints within a year or two.

A cabinet crown molding nailing strip, sometimes called a cleat, fixes this. It is a piece of wood fastened to the top of the cabinet that gives the molding a real surface to nail into.

How to build and attach a nailing strip:

  • Rip a strip of plywood or solid wood at the same spring angle as your crown molding profile
  • The spring angle on most residential crown molding runs at 38 or 45 degrees
  • Attach the nailing strip to the top of the face frame on each cabinet run using screws
  • Make sure it sits level even if the tops of your cabinets are not perfectly flat
  • Use your stud finder to find wall studs where the strip meets the wall so you get solid fastening points behind the cabinets

Once that nailing strip is in place you have something real to work against. Every nail you drive through the crown molding will hit solid material instead of thin cabinet top.

Picking the Right Molding Profile

Choose a profile that fits your kitchen style before you buy anything.

A simple cove crown molding works in most kitchens and is the most forgiving to cut and install. More ornate profiles with multiple curves look richer but are significantly harder to cope at an inside corner. If this is your first time with cabinet crown molding, start simpler.

Scale matters too. A large bold molding on short cabinets looks heavy and wrong. A thin flat molding on tall cabinets looks like an afterthought. Hold a piece of the actual molding up against your cabinets in the store or before you buy the full run. What it looks like in context is all that matters.

How Do You Cut Crown Molding for Cabinets

This is where most people get stuck and waste the most material.

Crown molding sits at a spring angle between the cabinet and the ceiling. It is not flat against either surface. That angle is what makes the cuts feel backwards the first time you do them.

You can cut crown molding flat on the miter saw table with the molding lying at its spring angle against the fence. Or you can cut it upright against the fence with the top edge flat on the table. Flat on the table is easier for beginners to repeat consistently.

Understanding the difference between coping and mitering crown molding before you start cutting saves a lot of wasted stock.

A miter cut means cutting both pieces of molding at matching angles so they meet cleanly at the corner point. It works well at an outside corner and looks sharp when done right. At an inside corner though mitering is risky because gaps open up as the wood moves with temperature and humidity changes through the seasons.

A cope cut means cutting one piece square to the wall and then cutting the second piece to follow the exact profile of the first. It takes more time and practice but the joint stays tight even as the wood moves. Use cope cuts at every inside corner and miter cuts at every outside corner. That combination gives you the tightest result on a real kitchen installation.

Installing the Molding Step by Step

Nailing strip is in. Cuts are planned. Now you actually put crown molding on kitchen cabinets.

  1. Start at the most visible wall first. Usually that is the wall you see when you walk into the kitchen. Cut that first piece square on both ends if it runs wall to wall, or square on one end and mitered on the other end if it turns a corner.
  2. At an outside corner, cut both pieces at 45 degrees in opposite directions so they meet at the point of the corner. Apply wood glue to the joint before you nail anything. That glue does more to hold the outside corner together long term than the nails do.
  3. At an inside corner, cut the first piece square and butt it into the corner. Cut the second piece with a cope cut so it overlaps the profile of the first piece. Test the fit before you nail. A cope cut that is close but not perfect can be cleaned up with a coping saw or a small rasp.
  4. Drive nails through the molding using the brad nailer at the top edge into the nailing strip and at the bottom edge into the face frame. Two nail lines keep the molding flat and tight against both surfaces. You nail through the crown molding into the nailing strip, not into the cabinet top directly.

Scribing to an Uneven Ceiling

Older homes especially have ceilings that are not flat or perfectly level. That gap between the top edge of the crown molding and the ceiling is one of the most common problems with installing crown molding on cabinets in existing homes.

Scribing is how you fix it. Hold the molding in position and use a compass or scribing tool set to the width of the widest gap you can see. Run it along the ceiling while it marks a line on the molding below. Take the molding down, cut to the scribed line, and reinstall. It will follow the ceiling exactly.

If the gap is small, a clean caulk line after installation handles it fine. If the gap is large, scribe it. Caulk over a large gap shrinks, cracks, and looks bad within a year. Fix it properly or it will keep reminding you that you did not.

Finishing It Off

Once all the molding is up and nailed, go back and set any nail heads sitting proud of the surface using a nail set.

Fill them with wood filler if you are painting. Use a colored putty stick that matches the wood if you are staining.

Caulk the top edge where the molding meets the ceiling. Use a paintable latex caulk and tool it with a wet finger for a clean line. Caulk the bottom edge where the molding meets the face frame if any gap is visible there.

Let everything dry fully before you sand. Sand lightly if needed. Then prime and paint or apply your topcoat finish.

When the Cabinets Underneath Are the Problem

Crown molding installation sometimes reveals issues with the cabinets themselves. Doors that do not close right, boxes that are out of square, face frames that were never properly level.

If you run into that during DIY crown molding cabinets work, get it properly assessed before finishing the trim. Working with experienced cabinet makers in Idaho Falls who can look at the full installation tells you what actually needs fixing rather than covering up a problem that gets worse over time.

Corner Cabinets and Crown Molding Planning

Crown molding decisions connect directly to how your cabinet layout handles corners.

Blind corner cabinet placement, cabinet height, and whether to run molding above the refrigerator all link together. If you are working through a full kitchen layout and corner cabinets are part of it, looking at blind corner cabinets before the crown molding conversation starts means you are not making one decision that boxes in another.

Garage Cabinets and Finishing Details

Crown molding is mainly a kitchen conversation but finishing details come up in garage cabinet planning more than people expect.

If you are working on garage storage alongside a kitchen project, browsing garage cabinet ideas first gives you a clear picture of what works in that space before you commit to a layout or a finish approach.

Is DIY Crown Molding Cabinets Worth It?

For most people yes.

The tools are not expensive. The materials are forgiving enough that small mistakes get fixed with caulk and filler. The learning curve is real but manageable if you take your time on the cuts and do not rush the corner joints.

Where people get into trouble is rushing. A cope cut that is off by a degree. A nailing strip that is not quite level. A miter cut that is close but not right. These compound on each other fast.

Slow down at every step. Crown molding on cabinets is one of those finishing details people notice without knowing exactly what they are noticing. They just know the kitchen looks right. That is the whole point.

FAQs

How do you install crown molding on kitchen cabinets?

Build a nailing strip at the top of the cabinets first. Cut molding using miter cuts at outside corners and cope cuts at inside corners. Nail through the molding into the nailing strip at the top and into the face frame at the bottom. Caulk gaps, fill nail holes, and finish.

What size nails do you use for crown molding on cabinets?

2-inch 18-gauge brad nails work well for most installations. Use slightly shorter nails at corners where two pieces of molding join together.

Do you nail crown molding directly to cabinets?

No. Build a cabinet crown molding nailing strip first and nail into that. The top of a cabinet does not have enough material to hold nails reliably long term.

How do you cut crown molding for cabinets?

Use a miter saw set to the spring angle of the molding. Miter outside corners and cope inside corners for the tightest and most durable joints.

What is the difference between coping and mitering crown molding?

Mitering cuts both pieces at matching angles so they meet at the corner point. Coping cuts one piece to follow the profile of the other. Coping works better at inside corners because the joint stays tight as wood moves seasonally.

Cupboard vs Cabinet difference

Cupboard vs Cabinet: What’s the Difference

People tend to struggle when they attempt to answer this question. The actual distinction between a cupboard and a cabinet remains unknown to most people. Most people start answering and then stop halfway through because they realize they are not totally sure. The two words get thrown around like they mean the same thing. The two words share meaning at some times yet differ in their usage at other times.

The kitchen remodel planning process and the contractor communication require you to understand this information because getting it wrong creates both minor inconveniences and major financial losses. The explanation uses basic language to present both concepts while showing their distinct characteristics and their appropriate usage situations.

What Is a Cupboard?

So what is a cupboard? The cupboard definition is simple. It is an enclosed piece of furniture with doors and shelves. That is the core of it.

The word comes from “cup board,” which was literally just a flat board where cups sat. Over time, it became a catch-all term for enclosed storage in a home.

Cupboards are simple by nature. Doors, shelves, storage. Most have no drawers. No fancy hardware beyond a basic hinge. They are not part of a bigger system. They just store things.

They can be freestanding or built directly into a wall. A built-in cupboard sits flush with the wall. A freestanding one stands alone, and you can move it.

Common examples include pantry cupboards, linen cupboards, hutches, wardrobes, armoires, and under-stair cupboards. The cupboard meaning in everyday speech is broad and depends a lot on where you grew up.

What Is a Cabinet?

What is a cabinet? The cabinet definition is tighter.

It is a built storage unit designed for a specific room and purpose. Kitchen cabinets, vanity cabinets, base cabinets, wall cabinets, tall cabinets. These get installed as part of a coordinated layout, not placed around a room individually.

The construction is where it really differs from a cupboard. A kitchen cabinet has a cabinet box, a face frame, a cabinet door, soft-close hinges, and drawer slides. Better builds use dovetail joinery in the drawer boxes because that holds up under years of daily use.

Materials range from solid hardwood like oak, maple, cherry, walnut, and hickory in quality builds, to plywood for cabinet boxes, to MDF, particleboard, veneer, and laminate at lower price points.

A pantry cabinet built from solid hardwood with a face frame is a completely different product from a basic freestanding cupboard. Both store things. That is about where it ends.

Why People Get These Two Mixed Up

Honestly it is mostly a geography thing.

In the US, cabinet is the word people use. Kitchen cabinets, bathroom cabinets, garage cabinets. Nobody really says cupboard in everyday American conversation unless they are talking about something freestanding or they grew up somewhere else.

In the UK and Australia it flips. What Americans call a kitchen cabinet, British people call a kitchen cupboard. Same object. Totally different word. Neither is wrong.

So when people argue online about cupboard meaning vs cabinet meaning they are often just arguing about regional language habits more than anything else. The objects themselves overlap a lot.

And for anyone wondering what is a cupboard called in America, the answer is pretty much just cabinet. Knowing the types of cupboards helps clarify why the word covers so much ground.

The Real Differences Between Cupboard vs Cabinet

Okay here is where cupboard vs cabinet gets useful and practical.

Construction and hardware:

  • Cabinets use specific hardware, soft-close hinges, drawer slides, and dovetail joinery in quality builds
  • Cupboards keep it simple, basic hinges, and not much else
  • A cabinet box is built to support countertops and take serious daily use over many years
  • Cupboards handle lighter storage and do not carry that structural load

Function and placement:

  • Cabinets are designed for specific rooms and follow standard sizing, so they work together as a layout
  • Cupboards work as standalone storage in pretty much any room without needing to connect to a larger system
  • Base cabinets and wall cabinets are sized to coordinate with each other
  • Cupboards come in all kinds of sizes with no system behind them

Materials typically used:

  • Custom cabinets use solid hardwood, high-grade plywood, and quality veneer
  • Freestanding cupboards more often use MDF, particleboard, or laminate, especially at lower price points
  • Better cupboards can use solid wood, but rarely match the build tolerances of custom cabinetry

Types of Cupboards You Will Actually Come Across

  • Pantry cupboard: Stores food and kitchen goods. Can be freestanding or built-in.
  • Linen cupboard: Usually in a hallway or bathroom. Towels, bedding, bathroom supplies.
  • Built-in cupboard: Framed into a wall. Common in older homes where recessed storage fits naturally.
  • Wardrobe or armoire: Freestanding clothing storage. Armoires are taller and more decorative, usually.
  • Hutch: A two-piece unit with a base and an open or glass-fronted upper section. Dining rooms mostly.
  • Under-stair cupboard: Built into the space beneath a staircase. Really practical use of otherwise wasted space.

Types of Cabinets

  • Base cabinet: On the floor, it supports the countertop. The starting point of any kitchen layout.
  • Wall cabinet: Mounts above the countertop. Every day storage for dishes and food.
  • Tall cabinet: Floor to ceiling. Great for a pantry cabinet or utility storage.
  • Vanity cabinet: Below a bathroom sink. Toiletries and cleaning supplies.
  • Pantry cabinet: A tall, dedicated unit just for food. Freestanding or built-in.
  • Blind corner base cabinet: Built specifically for kitchen corners where regular cabinets leave dead, unusable space.

The types of cabinets you choose depend entirely on the room and how the layout needs to work. Before committing to a bathroom layout, looking at real bathroom cabinet ideas first saves a lot of backtracking later.

The Corner Thing Nobody Talks About Enough

Corners in kitchens are genuinely a pain.

A basic cupboard pushed into a corner wastes most of the space inside it. You can reach whatever is right at the front. Everything behind that? Dead storage. It sits there untouched for months.

A properly designed blind corner base cabinet handles this differently. Pull-out shelves or swing-out hardware bring things forward so you can actually reach the back. That only exists in cabinetry. A standard cupboard just cannot do it, no matter how you position it.

Are Cupboards Cheaper?

Usually, yes for freestanding options at similar quality levels.

But it gets messy fast. A budget flat-pack kitchen cabinet can actually cost less than a solid wood freestanding cupboard. Price really depends on materials, size, and whether you are paying for professional installation on top of the unit itself.

Custom cabinetry costs the most upfront. No question about that. But it fits your exact space, uses quality materials throughout, and lasts for decades with normal care.

On Custom Cabinets and Long-Term Value

Working with the best cabinet maker in the United States means getting something built specifically for your home.

The doors line up. The cabinet box fits the wall perfectly. The hardware works smoothly years down the line. None of that happens with a generic cupboard you pulled off a showroom floor.

And at resale? Built-in cabinetry is part of the home and adds to its value. A freestanding cupboard is furniture. It leaves with you when you go.

Cupboard vs Cabinet: Which One Do You Actually Need?

Need something flexible you can move later or swap out without much hassle? A cupboard works fine for that.

Fitting out a kitchen or bathroom where storage needs to be permanent and built into the room? Cabinets are the right call, and there is not really a debate there.

The difference between a cabinet, a cupboard, and a closet is worth knowing too. A closet is a dedicated room or recessed space for clothing. A wardrobe is the freestanding version of that. Cabinet vs cupboard and cupboard or cabinet are questions that come down to one thing. How permanent do you need the storage to be?

Does What You Call It Actually Matter?

In casual conversation, not really. Everyone knows what you mean.

But when you are talking to a contractor or ordering from a supplier, it matters more than you think. Asking for a cupboard in a kitchen context might get you a freestanding piece when what you need is a built-in base cabinet. Small wording difference. Big difference in what shows up at your door.

To Wrap It Up

Cupboard vs cabinet is not a trick question. It just feels like one because the words overlap so much in everyday speech.

Cupboards are simple, flexible, and freestanding. Cabinets are precise, permanent, purpose-built. Both store things behind doors. But the construction, materials, hardware, and what they do for your home long term are genuinely different from each other.

Know which one you actually need before you start shopping. That single step saves more time and money than almost anything else in a storage or remodel project.

FAQs

Why do British people say cupboard and Americans say cabinet?

It is just regional language history. British English kept cupboard as the default word. American English shifted toward cabinet especially for built-in kitchen and bathroom storage. Same object, different word depending on where you grew up.

Are cupboards cheaper than cabinets?

For freestanding options at similar quality levels, usually yes. Custom cabinets cost more but they last longer and add real value to the home when you sell.

Do cabinets have drawers and cupboards don’t?

Not a hard rule but cabinets much more commonly include drawers as part of the design. Most basic cupboards are just doors and shelves with nothing else inside.

Which is better for resale value?

Cabinets, especially custom ones. Built-in cabinetry is part of the home and factors into its value. A freestanding cupboard is furniture and leaves with the seller.

Can I use a cupboard as a cabinet?

You can store the same things in both. But a freestanding cupboard will not fit a kitchen layout the same way and will not add the same long-term value to the room.

custom vs rta cabinets comparison

Custom Cabinetry vs RTA Cabinets: What’s the Difference

Planning a kitchen remodel or bathroom remodel means making a lot of decisions. Cabinets are the biggest one.

Two options come up constantly. Custom cabinetry and ready-to-assemble cabinets. They sit at opposite ends of the spectrum. Picking the wrong one wastes money. This guide covers what each one is, what it costs, and which one fits your project.

What Are Ready-to-Assemble Cabinets?

Ready-to-assemble cabinets ship flat and get put together on site.

They come in standard sizes, usually in three-inch increments. You pick from fixed door styles and cabinet finishes. There is no real customization beyond that.

RTA cabinets sell online and through big box stores. Cabinet assembly does not require professional skills. A reasonably handy person can put together a full kitchen over a weekend.

Material quality varies a lot. Some use all-wood construction with plywood boxes. Others use MDF cabinets or particleboard. Quality depends entirely on what you spend.

What Are Custom Cabinets?

Custom cabinets are built specifically for your space.

Every dimension gets measured to fit your exact room. You choose the wood species, cabinet design, hardware, and interior layout. Shaker cabinets, modern cabinets, transitional cabinets. The cabinet door styles available go far beyond any RTA catalog.

Materials are typically solid wood or high-grade plywood cabinets. The joinery is stronger. The finish is applied in a controlled shop environment.

Cabinet installation is done by professionals. You are not assembling these yourself.

The Real Difference Between RTA and Custom Cabinets

The difference between RTA and custom cabinets comes down to one thing. With RTA you choose from what exists. With custom you decide what gets built.

That matters a lot in older homes where walls are not square. It matters in kitchens where standard sizing just does not work. Custom cabinets fill every inch of your space. RTA cabinets leave gaps that need filler strips.

Custom work also comes with a real cabinet warranty. When something fails you have someone to call who built it and knows exactly what went into it.

Cost Breakdown: Custom Cabinetry vs RTA Cabinets

RTA cabinet cost per linear foot runs between $75 and $250. For an average kitchen that works out to $1,500 to $5,000 for the cabinets before installation.

Custom cabinetry cost per linear foot runs between $500 and $1,500 on the low to mid end. A full kitchen at the lower end of custom pricing typically lands between $10,000 and $25,000.

Are RTA cabinets cheaper than custom cabinets? Yes, by a wide margin. But the gap reflects real differences in materials, fit, and how long they last.

Budget is the main driver for most people. RTA gets you a functional kitchen for far less upfront. Custom makes sense when you are investing in a home for the long term.

How Long Do They Last?

How long do custom cabinets last compared to RTA? Usually much longer.

Well-built custom cabinets from solid wood or quality plywood can last 25 to 50 years. The finish can be repaired. The boxes stay square because they were built to exact tolerances.

RTA cabinets vary. A solid all-wood RTA cabinet can last 15 to 20 years. A cheap particleboard version might show wear within five. Drawer slides and hinge hardware fail first on budget options.

Custom Cabinet Pros and Cons

Custom cabinets give you the best fit, the most design freedom, and the longest lifespan. The trade-offs are higher cost and a lead time of 6 to 12 weeks from order to cabinet installation.

RTA cabinets vs custom cabinets on the budget side looks very different. RTA is cheaper, ships fast, and works well for DIY installation. The trade-offs are limited sizing, variable quality, and a shorter lifespan at lower price points.

Can You Mix Custom and RTA?

Yes. Plenty of homeowners do it.

Some use RTA cabinets in a pantry or laundry room and spend the budget on custom work in the kitchen. Others do custom uppers where they are more visible and RTA lowers where they are not.

It takes some planning to match door styles and finishes. But it is a practical way to manage budget without cutting quality where it shows most.

Talking with experienced cabinet makers early helps you figure out where custom work adds the most value and where RTA fills the gaps without hurting the finished look.

What About Storage in Other Rooms?

Cabinets are not just a kitchen decision.

Closets, garages, and built-ins all come into the same conversation when you are thinking about how a home works day to day. If you are planning beyond the kitchen, knowing custom closet costs upfront helps you budget the full project without surprises later.

Corners Are Where It Gets Practical

One spot where custom cabinetry vs RTA cabinets shows the biggest difference is in corners.

Standard RTA corner options are limited. A lazy susan or a basic blind corner box. Neither makes great use of the space.

Custom work handles corners better. A properly built blind corner base cabinet sized to your exact dimensions uses that space far more effectively than anything in a standard catalog. In a kitchen with multiple corners, that difference adds up fast.

Which One Is Right for You?

Custom cabinetry vs RTA cabinets is not a question with one universal answer.

RTA makes sense when the budget is tight, the timeline is short, or standard sizing works for your space. The system functions effectively in rental properties and flip projects, which do not need permanent solutions. A custom cabinetry contractor becomes essential for your home when you plan to reside there permanently, your area has nonstandard dimensions, and your design needs exceptional quality. The higher upfront cost spreads across decades of daily use. Most people land somewhere in the middle. You must understand your main goals. You must determine your spending limits. These two factors should guide your choices.

FAQs

How much cheaper are RTA cabinets compared to custom?

RTA runs $75 to $250 per linear foot. Custom runs $500 to $1,500 or more. For a standard kitchen that gap can mean $10,000 to $20,000 or more depending on size and materials.

Are RTA cabinets good quality?

Some are. All-wood RTA with plywood boxes can be solid. Particleboard options at the lower price points wear out faster. Check the box material and hardware before buying.

How long do custom cabinets take?

Most projects take 6 to 12 weeks from design approval to installation. Factor that into your remodel timeline from the start.

Which is more eco-friendly?

Custom cabinets often use locally sourced solid wood and produce less waste. Some RTA brands use certified sustainable materials. It depends more on the specific manufacturer than the category.


Frameless vs Framed Cabinets Comparison

Frameless Cabinets vs Framed Cabinets

You are picking cabinets, and someone mentions framed vs frameless. Maybe your contractor used the phrase. Maybe you saw it on a product page. Either way, you need to know what it actually means before you spend any money.

Here is the plain breakdown of framed vs frameless cabinets. What each one is, how the construction differs, and which makes more sense for your kitchen.

What Is a Framed Cabinet and How Is It Built?

So what is a framed cabinet exactly? It has a face frame attached to the front of the cabinet box.

That face frame is built from horizontal pieces called rails and vertical pieces called stiles. It wraps around the cabinet opening and gives the door something solid to mount against.

This is the American-style cabinet. Framed cabinet construction has been the default in US homes for decades.

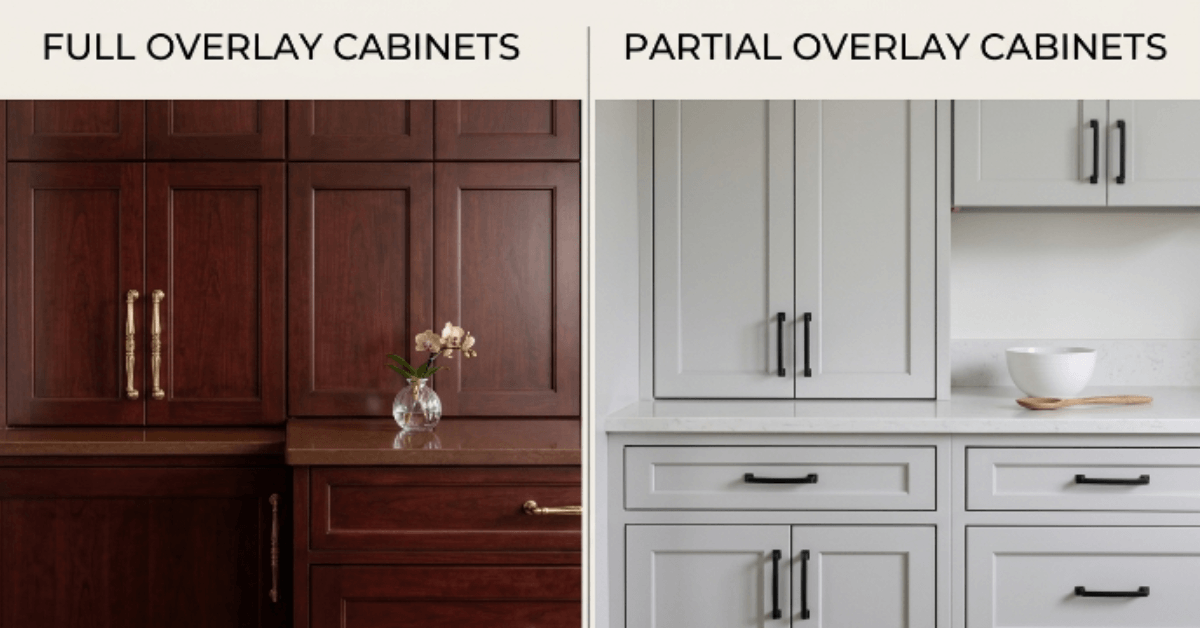
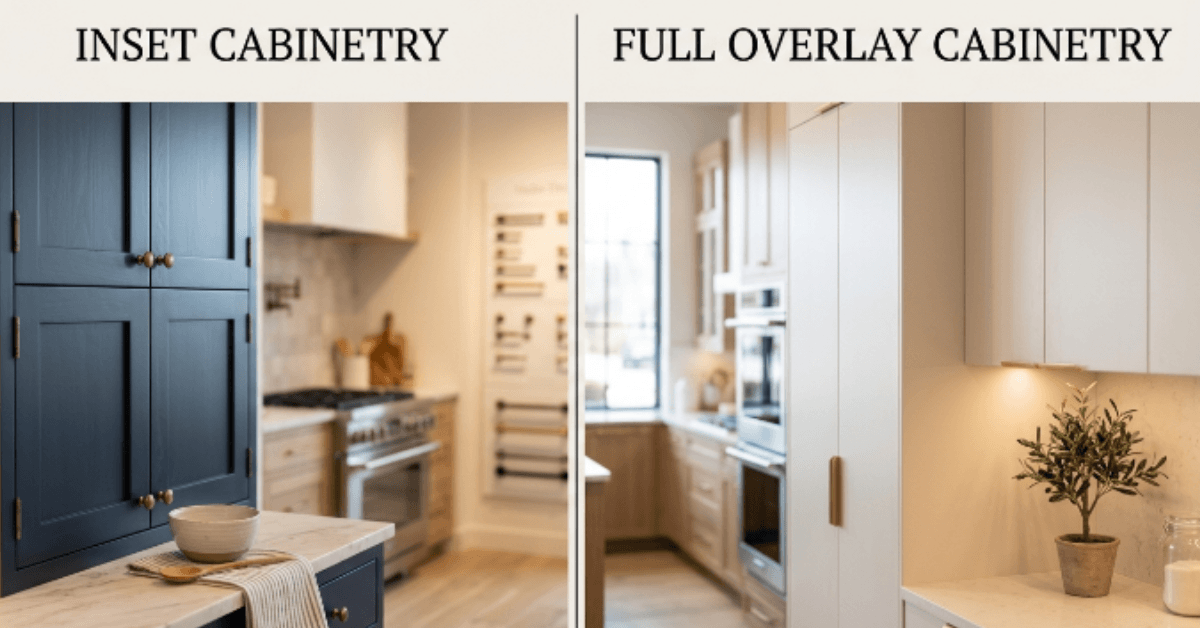
The reveal is the small visible gap between the door edge and the face frame. Cabinet door overlay options determine how much of the frame shows. Standard overlay covers a little. Full overlay covers most of it. The inset overlay puts the door flush inside the frame opening completely.

What Is a Frameless Cabinet and How Does It Differ?

What is a frameless cabinet? Simply put, it has no face frame. Doors mount directly onto the cabinet box.

This is the European-style cabinet. It developed in postwar Europe when materials were tight, and efficiency mattered. That is why frameless cabinets are called European cabinets even when they are made domestically.

Without a face frame blocking the opening, you get the full width of the cabinet box to work with. That is where the storage claim comes from.

Frameless cabinet construction requires a thicker and stronger cabinet box to handle racking. What is racking in cabinet construction? It is the tendency of the box to lean or twist under load. A face frame controls that on framed cabinets. On frameless cabinets, the box itself has to do that job.

Full Overlay vs Inset: How They Look Different

Full overlay vs inset and face frame vs frameless are closely connected conversations.

Full overlay covers nearly all of the face frame. The kitchen looks clean and continuous. Inset sits flush inside the frame opening and gives a traditional furniture-like appearance. Both are only possible because the face frame exists to work with.

Frameless cabinets use full overlay by default. There is no frame to inset into, so the door simply covers the full box opening every time.

The Difference Between Framed and Frameless Cabinets in Storage

The difference between framed and frameless cabinets on storage is real but small.

A face frame eats about an inch of usable opening on each side. Frameless gives you the full cabinet box width. For most items, that gap is barely noticeable. Where it matters is pull-out drawers and organizers. Frameless accommodates these more easily because nothing interrupts the opening.

Can you put glass doors on frameless cabinets? Yes, glass doors work on both. On frameless, the look is cleaner because there is no frame surrounding the opening.

Framed vs Frameless Cabinets Cost

Frameless cabinets generally cost more.

The thicker cabinet box material needed to replace what the face frame does structurally costs more and weighs more. Framed cabinets use thinner box material because the face frame carries some of the load. That makes framed construction less expensive at comparable quality levels.

The gap narrows at the custom level, where framed vs frameless cabinets pros and cons matter less than the quality of what goes into the build.

Frameless Cabinets Vs Framed Pros and Cons: Side by Side

Framed cabinets:

  • Standard in American kitchens and easy to source
  • Less expensive than frameless at comparable quality
  • Face frame controls racking and adds structural rigidity
  • Offers inset, standard overlay, and full overlay options

Frameless cabinets:

  • Full overlay is standard, giving a cleaner, modern look
  • Slightly wider cabinet opening for pull-out storage
  • Cabinet box must be thicker to handle racking without a face frame
  • Better suited to contemporary and minimalist kitchen styles

Which One Works Better for a Small Kitchen?

Frameless cabinets give a small kitchen a cleaner visual line. Full overlay doors with no frame showing creates a more continuous look across the cabinet run.

Are frameless cabinets better than framed? Not necessarily. A framed kitchen with full overlay doors looks nearly identical. Layout and overlay choice matter more than frameless cabinets vs framed construction in small spaces.

Built-in closet systems follow the same framed versus frameless trade-offs. If you are thinking about a closet project alongside your kitchen, looking at custom closets vs ready made closets first helps you apply the same thinking before committing.

Getting It Built Right

Frameless cabinets vs framed is less important than build quality. Both can be built well or badly.

What matters is the cabinet box material, the hinge quality, the drawer slide system, and the joinery behind the face frame or box. Working with an experienced custom cabinetry contractor means that either style holds up properly for decades, regardless of which construction method you choose.

FAQs

Are framed cabinets stronger than frameless?

The face frame adds rigidity and controls racking on framed cabinets. Frameless cabinets compensate with a thicker box. Both are equally strong when built properly.

Do frameless cabinets really have more storage?

Slightly. No face frame means the full box opening is accessible. The real benefit shows up with pull-out organizers more than standard shelf storage.

Are frameless cabinets more expensive than framed?

Generally yes. Thicker box material costs more. The gap narrows at the custom level where build quality matters more than construction method.

Can you mix framed and frameless in the same kitchen?

Not recommended. Door heights and alignments differ between systems and getting them to look consistent takes significant extra work.

Which is better for a small kitchen?

Frameless gives a slightly cleaner visual line. But a framed kitchen with full overlay doors looks nearly the same. Layout matters more than construction method.


standard cabinet dimenssion image with visuals

What Are Standard Cabinet Dimensions?

Here is the thing nobody tells you before a kitchen remodel.

Cabinet dimensions are not exciting. They are not the fun part. But get them wrong and you are stuck with gaps between cabinets, a countertop sitting too high, or wall cabinets that look weirdly low. Fixing that after the fact costs real money.

So before you pick a style or a finish or anything else, learn the numbers. This cabinet sizes guide covers everything. Base cabinets, wall cabinets, tall cabinets, pantry cabinets, vanity cabinets. Plain measurements, no nonsense.

Why Does Any of This Get Standardized?

Good question actually.

A kitchen operates as an integrated system. The existence of standard kitchen cabinet sizes results from the fixed needs of countertops and appliances and the people who use those items. Most adults find a 36-inch countertop height to be suitable for their needs. Standard appliance cutouts are designed to match the dimensions of standard cabinet openings. When everything follows those numbers the kitchen fits together cleanly.

When it does not, you are buying filler cabinets to hide the gaps. Not a great look.

Base Cabinet Dimensions

Base cabinets sit on the floor. They carry the countertop and anchor the whole kitchen layout.

How tall are standard base cabinets? The cabinet box itself sits at 34.5 inches. Add a countertop and you land at 36 inches. That is the number everything else gets built around.

Standard cabinet depth for a base cabinet is 24 inches. Standard cabinet width runs from 9 inches all the way to 48 inches in 3-inch increments.


MeasurementStandard Size
Height without countertop34.5 inches
Height with countertop36 inches
Depth24 inches
Width range9 to 48 inches
Width increments3 inches

The toe kick sits at the very bottom of the base cabinet. It is 3.5 inches tall and 3 inches deep. Without it you would stub your toes on the cabinet box constantly.

Other base cabinet things worth knowing:

  • Sink base cabinets need to be wider for plumbing. Common widths are 30, 33, and 36 inches
  • Corner base cabinets run 36 by 36 inches to handle the turn in the layout
  • Drawer base cabinets come in 12, 15, 18, and 24-inch widths
  • Narrow layouts sometimes drop to 12-inch depth instead of the standard 24

Wall Cabinet Dimensions

Wall cabinets mount above the countertop. Upper cabinet dimensions show more variation than base cabinets because different homes have different ceiling heights.

How tall are upper kitchen cabinets? Most kitchens have 30 or 36-inch-tall wall cabinets. The 30-inch cabinets create an overhead space that shows when you have an 8-foot ceiling. The 36-inch option brings greater proximity while providing additional storage space.

How high are wall cabinets installed above the countertop? Standard installation puts the bottom of the wall cabinet 18 inches above the countertop surface. The design enables users to operate kitchen appliances without obstruction while keeping upper cabinets within their reach.

Standard cabinet depth for wall cabinets is 12 inches. Standard cabinet height options run from 12 inches all the way up to 42 inches, depending on ceiling height and personal preference.


MeasurementStandard Size
Height options12, 15, 18, 24, 30, 36, 42 inches
Depth12 inches
Width range9 to 48 inches
Width increments3 inches


Wall cabinet height by ceiling height, quick guide:

  • 8-foot ceiling: 30 or 36-inch wall cabinets work well
  • 9-foot ceiling: 36 or 42-inch wall cabinets fill the space better
  • 10-foot ceiling: 42-inch cabinets plus a filler cabinet above or open display space

Tall Cabinet Dimensions

Tall cabinets go floor to ceiling. They handle pantry storage, utility storage, or housing built-in appliances like wall ovens and refrigerators.

Standard cabinet height for tall cabinets runs at 84, 90, or 96 inches depending on ceiling height. Standard cabinet depth varies more than other cabinet types because different uses need different depths.


MeasurementStandard Size
Height84, 90, or 96 inches
Depth12 to 24 inches
Width range18 to 36 inches
Width increments3 inches


A filler cabinet used to close awkward gaps between other cabinets might be as narrow as 3 inches wide. Pantry cabinets that match base cabinet depth run the full 24 inches. Cabinet height, width, depth all shift based on what the tall cabinet is actually doing in the layout.

Pantry Cabinet Dimensions

What is the standard height of a pantry cabinet? Most sit between 84 and 96 inches tall, 24 inches deep, and 18 to 36 inches wide.


MeasurementStandard Size
Height84 to 96 inches
Depth24 inches
Width18, 24, 30, or 36 inches


A pantry cabinet next to a refrigerator or at the end of a run uses every inch of that wall.

Upper vs Lower Cabinet Dimensions

Lower cabinet dimensions and upper cabinet dimensions are different on purpose.

Lower cabinets go 24 inches deep to carry the countertop load. Upper cabinets go 12 inches deep to stay within reach.

The face frame on each cabinet creates a consistent visual line across both. Behind that face frame though the cabinet box on an upper and the cabinet box on a lower are completely different animals.

Bathroom Vanity Cabinet Dimensions

Bathroom vanity cabinet dimensions differ from kitchen base cabinet dimensions mainly because they are shorter.

Standard height sits between 31 and 35 inches. Comfort height vanity cabinets run 34 to 36 inches and are getting more common because they are just easier on your back during daily use.


MeasurementStandard Size
Height31 to 35 inches
Depth17 to 24 inches
Width24 to 72 inches


Depth varies with sink size and plumbing setup. A small half bath might use a 17-inch deep vanity cabinet. A large master bathroom might go the full 24 inches to fit a bigger sink basin and more storage underneath.

Quick Reference Cabinet Size Chart

Here is the full cabinet size chart in one place. Print it out if that helps.


Cabinet TypeHeightDepthWidth Range
Base cabinet34.5 inches24 inches9 to 48 inches
Wall cabinet12 to 42 inches12 inches9 to 48 inches
Tall cabinet84 to 96 inches12 to 24 inches18 to 36 inches
Pantry cabinet84 to 96 inches24 inches18 to 36 inches
Vanity cabinet31 to 35 inches17 to 24 inches24 to 72 inches
Filler cabinetMatches adjacent12 to 24 inches3 to 6 inches
Sink base cabinet34.5 inches24 inches30 to 36 inches

How to Measure for New Cabinets

How to measure an area for new cabinets is simpler than people think. Get the numbers before anything gets ordered.

What to write down before you do anything else:

  • Total wall length measured in linear foot increments
  • Exact location of windows, doors, vents, and pipes
  • Ceiling height so you know which wall cabinet and tall cabinet heights actually fit
  • Whether walls are square, older homes are often not and that matters more than people expect
  • Appliance cutout sizes for your dishwasher, refrigerator, and range before cabinets get finalized

Cabinet height, width, depth all need to work together. Do not trust your memory on any of this.

When Standard Cabinet Dimensions Do Not Work

Standard cabinet dimensions handle most kitchens. Not all though.

Older homes with irregular walls or unusual ceiling heights often need something a catalog just does not carry. A custom cabinet manufacturer builds to your exact numbers. No gaps, no filler strips, no workarounds.

Garages are a classic example of where standard sizing falls apart. Posts in awkward spots, wall lengths that do not match standard cabinet widths, storage needs that a basic base cabinet box cannot handle. If any of that sounds familiar, looking at garage cabinetry services designed around your actual space is a smarter starting point.

When Built-Ins Beat Cabinets

Sometimes the right answer is not a cabinet at all.

Window seats with storage, built-in shelving, custom media units. These follow their own cabinet dimensions rather than kitchen standards. If your project does not fit the standard cabinet sizes guide, Idaho Falls custom furniture built around your specific wall or room is probably closer to what you actually need.

Do You Need Custom Cabinets?

Honestly most people do not. Standard cabinet dimensions cover the majority of kitchens and bathrooms just fine.

But if your space is unusual, if you want specific joinery and materials, or if you want a custom cabinet manufacturer to build something that genuinely fits your home rather than something you adapt your home around, that conversation is worth having.

The best cabinet maker in the United States builds to your kitchen rather than the other way. You notice that difference on day one and every day after.

To Wrap It Up

Cabinet dimensions are not complicated. Once you know the baseline numbers the rest of the planning gets a lot easier.

Base cabinets at 34.5 inches tall and 24 inches deep. Wall cabinets at 12 inches deep, installed 18 inches above the countertop. Tall and pantry cabinets at 84 to 96 inches. Vanity cabinets a few inches shorter than kitchen base cabinets.

Get the standard cabinet dimensions right first. Everything else in the layout follows from there.

FAQs

What are standard cabinet door and drawer heights?

Doors on base cabinets run the full height of the cabinet box, somewhere between 24 and 30 inches depending on drawer configuration. Common drawer heights are 6, 7.5, and 10 inches. A standard three-drawer base cabinet stacks those to fill out the 34.5-inch cabinet height.

Are RTA cabinets the same dimensions as standard cabinets?

Yes. Ready-to-assemble cabinets follow the same standard cabinet dimensions as assembled ones. Difference is in how they ship and get put together, not in the actual sizing. A 30-inch wide RTA base cabinet is the same width as a 30-inch assembled cabinet.

Can cabinet dimensions be customized?

Yes. A custom cabinet manufacturer builds to whatever dimensions you need. Height, depth, width, all adjustable. Most useful in older homes where walls are not square or ceiling heights do not line up with standard sizing increments.

Walk In Closet Ideas 2026

Walk In Closet Ideas 2026: Smart Layouts, Storage Solutions & Design Tips

Your closet is a disaster. Things fall out when you open the door. You can never find matching shoes. Half the stuff in there hasn’t been touched in two years. Sound familiar?

Here’s the thing — that’s not a you problem. It’s a design problem. And the right walk in closet ideas can fix it faster than you’d think.

This guide covers smart layouts, practical storage solutions, lighting upgrades, and what’s actually trending in walk in closet design ideas for 2026. Whether you’re working with a small spare room or a full master suite, there’s a real plan in here for you.

Start With the Layout — Everything Else Depends on It

walk in closet

Before you buy a single shelf bracket or pull-out drawer, get the layout right. This is where most walk in closet design ideas either succeed or fail.

U-Shaped Layout

Three walls of storage, maximum hanging space, and even room for a centre island if your space allows—this is why U-shaped designs remain one of the most popular walk in closet layout ideas, offering versatile storage and effortless zoning in a single, cohesive space.

It works best in rooms that are at least 7 x 10 feet. One wall for long hang items like coats and dresses, one for double hanging rods, and the third for shelving and shoes. That’s your morning routine sorted before you’ve even thought about lighting.

L-Shaped Layout

Two walls, open floor plan, natural zones. This is one of the smartest narrow walk in closet ideas because it keeps the room from feeling boxed in while still giving you solid capacity on both walls.

Works well when a door or window cuts off one full wall of the room.

Single-Wall Layout

If the room is genuinely small, fight the urge to cram shelving on every surface. A single well-designed wall beats three poorly executed ones. Pair it with a mirror on the opposite wall and the space opens up immediately.

This is the go-to approach for small walk in closet ideas on a budget — put the money into one wall and do it properly.

Parallel Layout

Two facing walls with a walkway between them. Great for long, narrow rooms like converted hallways. The storage naturally splits into zones, and it’s one of the easier layouts to keep tidy because each side has a clear purpose.

Walk In Closet Organisation Ideas That Hold Up Over Time

Walk In Closet Organisation Ideas

A lot of closet organisation advice sounds good but falls apart after three months. These ideas actually stick. These walk in closet organisation ideas are built to stay practical long-term, not just look good on day one.

Double Hanging Rods

If you have a single rod with empty space below it, you’re wasting half your hanging capacity. Double hanging rods for shirts, jackets, blouses, and folded trousers can effectively double your hanging storage without touching the footprint of the room. It’s one of the highest-return changes you can make.

Pull-Out Drawers

Fixed shelves look clean but require you to dig for things. Pull-out drawers bring the back of the shelf forward so you can actually see what’s there. For folded clothes, accessories, or anything that gets buried, this is the practical fix. Walk in closet ideas with drawers consistently rank as one of the most-used features once people have them.

Shoe Storage Done Right

Individual shoe cubbies beat piled shelving every time. You can see every pair, nothing gets crushed, and the whole section looks intentional instead of chaotic. Add under-shelf lighting and a basic shoe display becomes something you’re genuinely proud of.

The Valet Rod

Small, practical, often overlooked. A valet rod is a pull-out rod inside a cabinet that lets you hang tomorrow’s outfit, air out dry cleaning, or temporarily hold items that need to go back somewhere. Once you have one, you’ll wonder why it took you this long.

Velvet Hangers Across the Board

Switch every hanger in the closet to slim velvet. This costs almost nothing, gains you inches of rod space, stops items from slipping, and makes the entire closet look like someone intentional lives there. Do this first, before anything else.

Walk In Closet Shelving Ideas: Picking the Right System

Walk in Closet Sheving Ideas

Your shelving choice affects how the closet looks, how long it lasts, and how well it actually works day to day.

Wire shelving is affordable and breathable — good for items that need air circulation. It’s a reasonable starting point for DIY walk in closet ideas on a budget, but items tip over on wire, small accessories fall through, and it has a utilitarian look that’s hard to dress up.

Wood closet systems — usually melamine-coated — look more polished and feel more substantial. They’re the sweet spot for mid-range builds: durable, easy to clean, and available in finishes that work with most interiors.

Modular closet systems from retailers like IKEA or The Container Store sit between wire and fully custom. Flexible and faster to install than custom, but they come in fixed sizes that may not fit your space without awkward gaps or filler panels.

Built-in cabinetry is where things get properly tailored. Doors hide clutter, drawer sizes match what you’re actually storing, and the whole thing looks like it was always part of the house. This is the territory of custom cabinetry — and the difference in long-term functionality over modular systems is real.

Before you commit to either direction, understanding the difference between Custom closets vs readymade closets can save you from choosing a system that doesn’t fit your space long-term.

Walk In Closet Lighting Ideas That Make a Real Difference

Walk-In-Closet-Lighting

Poor lighting is why you wear navy thinking it’s black. In walk in closet ideas 2026, lighting plays a much bigger role than people expect. Poor lighting is why you wear navy thinking it’s black. It’s also why your closet always looks messier than it is. Good lighting fixes both.

Recessed LED Downlights

The standard for a reason. Space them evenly across the ceiling for consistent coverage with no shadows. Modern LEDs last years, use minimal energy, and don’t take up any visual space in the room.

Under-Shelf Lighting

This is where walk in closet lighting ideas go from functional to genuinely great. A strip of LED tape under each shelf illuminates the shelf below it, which means you can actually see what’s there without pulling things out. On a shoe wall display, it also looks incredible.

Motion Sensor Closet Lights

Walk in, light comes on. Walk out, light goes off. No switch fumbling with your arms full of clothes. Motion sensor closet lights are a small upgrade that makes every single morning slightly easier — and that adds up fast.

His and Hers Walk In Closet Ideas

Walk-In-Closet for Girl and Boy

Shared closets fail when two people with completely different wardrobes try to use the same setup. His and hers walk in closet ideas work because they assign space based on what each person actually owns — not an arbitrary 50/50 split.

If one person has twice as many hanging items, they need more rod space. If the other person has more shoes, they need more cubbies. Simple logic that most generic closet plans ignore.

Practical things to plan:

  • Separate hanging zones sized to each person’s wardrobe (not equal halves)
  • Individual shoe sections so shoes don’t migrate over time
  • Separate drawer sets — shared drawers become shared chaos within weeks
  • A centre island if the space allows, which gives both people a folding and staging area

The goal is a closet two people can use at the same time without bumping into each other, which matters a lot in master bedroom walk in closet ideas where mornings move fast.

Master Bedroom Walk In Closet Ideas

Master Bedroom Walk in Closet

The master bedroom closet carries more daily pressure than any other closet in the house. Two people, every day, often in a hurry.

A few things that matter here more than anywhere else:

Placement relative to the bathroom. Positioning the closet as a pass-through between the bedroom and ensuite makes getting ready noticeably smoother. It’s one of those layout decisions that sounds small until you experience it daily.

Drawer variety. Shallow drawers for jewellery and accessories. Medium drawers for folded t-shirts. Deep drawers for bulky knitwear. One drawer depth does not serve all of these well.

A full-length mirror inside the closet. Keeps the bedroom tidy and gives you an actual full-outfit view before you leave. Position it at the end of a shelving run or on the back of the door.

For more ideas on what actually works in bedroom spaces, there’s a solid collection of bedroom closets ideas worth browsing if you’re still in the planning stage.

Small Walk In Closet Ideas: Making a Tight Space Work

Small Walk In Closet Ideas

A small room is not a reason to give up on a proper walk in closet. It’s a reason to be more deliberate about it.

  • Go vertical. Most people stop using wall space at eye level. Everything above that is unused real estate. Shelving all the way to the ceiling, with a small step stool or pull-down rod for the upper section, gives you meaningful extra storage for seasonal items and luggage.
  • Use the door. The back of the closet door is free storage. Shoe racks, hooks, jewellery organisers, slim shelving for sunglasses or scarves — it all fits there without taking up any floor space.
  • Light it well. Small spaces feel smaller when they’re dark. Good lighting,  especially under-shelf lighting  creates the impression of more space and makes the room far more usable.
  • Edit your wardrobe. A small closet with only things you actually wear works better than a large one full of things you’re hanging onto just in case. The cleanout is part of the design process.

Walk in closet ideas for small rooms work best when you treat the constraint as a creative challenge rather than a limitation to spend your way out of.

Luxury Walk In Closet Ideas: What High-End Really Looks Like

luxury walk in closet

The best walk in closet design ideas at the luxury level aren’t just about expensive finishes — they’re about the depth of thought behind every detail.

  1. A dedicated shoe wall. Floor-to-ceiling shoe display shelving, lit with under-shelf LEDs, turns functional storage into something that genuinely looks like a boutique. Angled shelves showing shoes face-forward are popular for a reason.
  2. Glass-front cabinetry. Shows off what’s inside while keeping it dust-free. Works especially well for handbags, folded luxury knitwear, or anything with visual appeal worth displaying.
  3. A centre island with a stone top. Marble or quartz adds a tactile quality to the space. It’s a durable folding surface, a jewellery staging area, and a design statement in one piece.
  4. Integrated seating. A small upholstered bench inside the closet is more useful than it sounds — getting dressed while seated, pulling on boots, setting out the next day’s outfit. A seat changes how the whole space feels to use.
  5. Custom cabinetry from floor to ceiling. No gaps. No awkward filler panels. No shelf that’s two inches too short for what you’re trying to store. Everything fitted to your specific room and your specific wardrobe.

If this is the direction you’re heading, understand the real numbers first. The custom closets cost page breaks down what’s involved before you start conversations with designers.

Walk In Closet Makeover Ideas: Where to Begin

Walk In Closet Makeover Ideas

If you already have a closet that isn’t working, many walk in closet ideas 2026 focus on simple upgrades before full replacements.

  1. Start with a cleanout. Take everything out. All of it. Sort by category, donate what you don’t reach for, and put back only what earns a place. This step alone reveals how much space you actually have.
  2. Reconfigure the rod placement. A single rod at one height is what most builder-grade closets come with. Converting part of that space to double hanging rods is cheap and immediately changes the capacity of the room.
  3. Add lighting. LED strip lighting under shelves is inexpensive and makes the space dramatically more usable. Do this early — it changes how you see the whole room.
  4. Swap the hangers. Uniform velvet hangers across the board. Low cost, high impact, done in an afternoon.
  5. Then decide if you need more. Once you’ve done those things, you’ll know whether a bigger investment is worth it or whether targeted changes have solved the problem. Many people find that a good cleanout plus a few smart upgrades solves 80% of the frustration.

Walk in closet makeover ideas work best when you sequence them properly,  start cheap and targeted, then invest more if you still need to. 

Custom vs. Ready-Made: The Honest Answer

Custom vs Ready Made Closet Ideas

Ready-made closet systems work well for a lot of people. They’re accessible, reasonably priced, and a good solution for rentals or starter homes where a full build doesn’t make sense.

But they come in standard sizes. They may not reach your ceiling. The material quality is typically lower. And they don’t accommodate unusual room shapes, sloped ceilings, or specific wardrobe needs the way a designed system can.

Custom closets services solve those problems because everything is built around your space — not the other way around. Every inch is used. Finishes match your home. The result lasts significantly longer than a flat-pack system that gets adjusted and readjusted over the years.

The honest answer: for a rental or a temporary situation, modular makes sense. For a space you’re committed to, custom almost always wins in the long run.

Before You Spend Anything — Answer These First

What do you actually own?

Count your hanging items, shoes, folded clothes, and accessories. This tells you what type of storage you need most  not what looks good in someone else’s closet tour.

What are your real room dimensions?

Measure accurately, including ceiling height, door clearances, and any vents or awkward angles. These details determine which layouts and systems will actually fit.

Who uses this closet?

One person or two? Very different wardrobes or similar ones? This shapes the layout before anything else.

What’s your actual budget?

Not the dream number the real one. Walk in closet organisation ideas work at almost every price point, but only if the plan is honest about what’s available to spend. The best walk in closet organisation ideas work at almost every price point, but only if the plan is honest about what’s available to spend.

The Bottom Line

The best walk in closet ideas are the ones that match how you actually use your space. It’s the one designed around how you actually live — your wardrobe, your habits, your space.

Walk in closet ideas 2026 are pointing toward intentional design over just adding more storage. Fewer things, better organised. Lighting that works. Storage types matched to what you actually own. Layouts that two people can use without getting in each other’s way.

Start with a cleanout. Measure properly. Plan before you buy. And if you want to talk through what makes sense for your space with people who do this every day, Knudson Cabinetry is a good place to start.

top 15 bathroom cabinets ideas

Top 15 Bathroom Cabinet Ideas to Transform Your Space in 2026

Your bathroom cabinet does a lot of heavy lifting. It holds your skincare, your medicine, your hairdryer, and everything in between. But beyond storage, it sets the tone for the entire room. The right cabinet can make a small bathroom feel more open, a dated space feel fresh, and a plain room feel like it belongs in a design magazine.

Whether you’re doing a full remodel or just swapping things out, these bathroom cabinet ideas for 2026 cover everything from budget-friendly DIY options to built-in statement pieces. These bathroom cabinet ideas 2026 also focus on smart layouts, better storage, and updated finishes. Let’s get into it.

1. Floating Bathroom Cabinets for a Clean, Modern Look

Floating Bathroom Cabinets for a Clean, Modern Look

A floating bathroom cabinet is one of the smartest moves you can make if you want your bathroom to feel bigger without changing its footprint. Wall-mounted vanities free up floor space, which makes the room look larger than it actually is. They’re also easier to clean under. Add LED strip lighting underneath and the whole thing feels like a high-end finish without a huge price tag. Pair with brushed brass cabinet hardware for a look that’s current without being overdone.

2. Built-In Bathroom Cabinet Ideas for a Seamless Finish

Built-In Bathroom Cabinet Ideas for a Seamless Finish

Built-in bathroom cabinet ideas are perfect when you want storage that looks like it was always part of the room. These cabinets sit recessed in the wall or run floor-to-ceiling, giving you serious storage without eating into your square footage. Add a soft-close cabinet drawer system and a finish that matches your vanity.

If you’re working with a custom cabinet maker in Idaho, Knudson Cabinetry builds exactly this kind of fitted, tailored cabinetry that makes a bathroom feel custom from the ground up.

3. Warm Wood Vanity Cabinets

Warm Wood Vanity Cabinets

The all-white bathroom had a good run, but in 2026, warm wood is taking over. A bathroom cabinet ideas with wood finish adds natural texture to the space without feeling heavy or rustic. A warm wood vanity creates balance, especially when paired with a white oak vanity, which is especially popular right now because the grain is subtle and the color pairs with almost everything. Light wood tones with matte black fixtures or brushed brass hardware feel very much of the moment.

4. Sage Green Bathroom Cabinets

modern bathroom interior featuring sage green bathroom cabinets

Among bathroom cabinet colors 2026, sage green is leading. A sage green bathroom cabinet feels calm, photographs well, and works with both warm and cool tones. Try it on a freestanding bathroom storage cabinet with unlacquered brass hardware or go all in with a built-in linen cabinet bathroom unit featuring fluted cabinet front details for added texture.

5. Over Toilet Cabinet Ideas to Use Dead Space

over toilet cabinet ideas


The wall above your toilet is one of the most underused spots in the bathroom. Over toilet cabinet ideas give you storage where there was none before, which is a major win in a small bathroom. A frameless bathroom cabinet above the toilet feels light and unobtrusive. For something with more character, try a reeded glass bathroom cabinet to keep items out of sight while still adding visual interest.

These are also a great candidate for DIY bathroom cabinet ideas on a budget since many over-toilet units come pre-made and are simple to install yourself.

6. Small Bathroom Cabinet Ideas That Actually Work

small bathroom cabinets for extra storage


Small bathroom cabinet ideas need smart storage, not just more shelving. A recessed medicine cabinet sits flush with the wall and gives you mirrored storage without any added depth. A narrow freestanding bathroom storage cabinet can slide into a corner without blocking traffic. Pick a few well-chosen pieces and let them breathe.

7. Reeded Glass Bathroom Cabinets

reeded glass cabinets for bathroom


Reeded glass has become one of the standout details in bathroom design right now. A reeded glass bathroom cabinet gives you a bit of privacy while still feeling open and light. It works on upper cabinet doors or on freestanding pieces. If you have a linen cabinet bathroom setup and want it to feel more decorative, swapping solid doors for reeded glass panels is a simple change with a strong visual payoff.

8. Freestanding Bathroom Storage Cabinets

standing cabinets for modern bathroom

Not everyone wants to commit to a built-in. A freestanding bathroom storage cabinet gives you serious storage without permanent installation, which is ideal if you’re renting or still figuring out your layout. Today’s freestanding options include solid wood pieces that look like furniture, slim towers for corners, and tall linen cabinet units with adjustable shelving. Many also include soft-close cabinet drawers, which feel surprisingly well-made for a freestanding piece.

9. Frameless Bathroom Cabinets for a Modern Edge

frameless bathroom cabinets modern edge


A frameless bathroom cabinet has no visible frame around the door openings. Doors sit flush with the cabinet box, creating a seamless look that suits contemporary bathrooms. Frameless construction also means slightly more interior storage since there’s no frame cutting into the opening. Pair with integrated pulls or simple bar handles in matte black or brushed nickel to keep things clean.

10. Bathroom Vanity Cabinet Ideas with Double Sinks

bathroom vanity cabinets with double sink

If you share a bathroom, a double vanity is a practical upgrade. These bathroom vanity cabinet ideas for double setups include a continuous run of cabinets with a shared countertop and two undermount sinks. This looks cohesive and gives each person their own storage underneath. Go with soft-close cabinet drawers for everyday items and deep lower cabinets for larger products and spare linens.

Those planning a full bathroom remodel alongside a kitchen or other spaces can also explore Custom cabinetry in Park City, Utah, for cohesive bathroom vanity cabinet ideas across the whole home.

11. Fluted Cabinet Fronts for a Designer Detail

Fluted Cabinet Fronts for a Designer Detail

Fluted cabinet front designs add depth and texture without going over the top. The vertical ridges look particularly good in natural wood tones, where the texture comes through clearly. You can also find painted versions in white or sage green. It’s a small detail that makes a big difference, especially in bathrooms where everything else is fairly simple.

12. White Bathroom Cabinets Done Right

White Bathroom Cabinets Done Right

White bathroom cabinets stay relevant because they’re bright, clean, and work with almost any tile or floor color. In bathroom cabinet ideas 2026, the update is in the details. Shaker-style doors with matte black hardware, or flat-panel frameless cabinets in warm white rather than stark bright white, feel fresh. Warm whites pair better with wood tones and brass hardware than cool whites do.

13. Bathroom Cabinet Ideas Above Toilet with Built-In Shelving

Bathroom Cabinet Ideas Above Toilet with Built-In Shelving

Taking the over-toilet concept further, bathroom cabinet ideas above toilet treat that entire wall as a storage zone. A combination of open shelves and closed cabinet space works well here. Use the closed sections for cleaning supplies and extra toiletries. Use open shelves for folded towels, plants, and a few decorative items.

14. Tall Bathroom Storage Cabinet Ideas for Vertical Space

Tall Bathroom Storage Cabinet Ideas for Vertical Space


When floor space is tight, go vertical. A tall cabinet fits perfectly into bathroom storage cabinet ideas that focus on maximizing space. The units function effectively as linen cabinets for bathrooms because they store towels, toiletries, and cleaning supplies. Select a design which matches your vanity door style and your hardware to create an appearance of a coordinated room design. 

15. DIY Bathroom Cabinet Ideas on a Budget

DIY Bathroom Cabinet Ideas on a Budget

You can create an attractive bathroom design without high expenses. The budget-friendly DIY bathroom cabinet solutions will transform your entire bathroom space. The most cost-effective improvement for your space comes from painting your current cabinets. A quality finish in sage green or warm white makes a noticeable difference. Swapping to brushed brass cabinet hardware is the fastest fix of all. Adding a freestanding storage tower gives you extra storage with zero installation.

For storage projects beyond the bathroom, custom garage cabinetry services deliver the same built-in quality throughout the rest of your home.

Final Thoughts

There exists no correct solution for bathroom cabinet solutions because multiple options exist. The best choice depends on your available space, your requirement for storage, and the design style you want to achieve. The bathroom cabinet ideas 2026 demonstrate that space improvement requires no complete renovation work.

Start with the thing that’s bothering you most. Not enough storage? Focus on better bathroom storage cabinet ideas. Style feeling outdated? Small upgrades can go a long way.

Whatever direction you take, the goal is simple: a bathroom that works well every day and feels good to be in.

Best bedroom closet Ideas with organized shelves

Master Bedroom Closet Ideas That Make Your Space Feel Organized

A messy closet can ruin your whole morning.

You’re getting ready, running late, and suddenly you can’t find your favorite shirt. Or your shoes are buried under a pile. It’s frustrating. And it happens more often than it should.

The truth is, most closets are not designed properly. They don’t match how you actually use them.

That’s why smart master bedroom closet ideas matter. The right setup can save time, reduce stress, and make your bedroom feel more put together.

Whether you’re planning a full master bedroom closet remodel or just looking for better organization, these ideas will help you create a space that works for you.

Start With a Layout That Fits Your Space

Before picking colors or finishes, focus on layout.

Every closet is different. Some homes have space for a walk-in closet, while others rely on a reach-in setup.

If you have more room, explore walk-in closet designs for a master bedroom. These give you flexibility with storage and movement.

For smaller rooms, smart master bedroom reach-in closet ideas can still create an organized and stylish setup.

The key is to design around your space, not force a layout that doesn’t fit.

Use Built-Ins for a Clean and Custom Look

Loose shelves and random racks can make your closet feel messy.

That’s where closet built-ins for master bedroom spaces make a big difference.

Built-ins give everything a fixed place. No shifting, no clutter.

A built-in master bedroom closet can include:

  • Hanging rails for clothes
  • Drawers for smaller items
  • Shelves for folded pieces

This type of master bedroom closet design feels more polished and easier to use every day.

For a fully tailored setup, consider working with a custom closet maker to design storage that fits your lifestyle perfectly.

Divide Your Closet Into Sections

One of the best master closet organization ideas is simple: create sections.

Instead of mixing everything together, group items based on use.

For example:

  • Work clothes in one section
  • Casual wear in another
  • Accessories in drawers

This makes it easier to find things quickly.

Think of it like a small system inside your closet. Once everything has a place, staying organized becomes easier.

Double Hanging Rails Save Space

If your closet feels cramped, this is a quick fix.

A double hanging rail allows you to hang clothes in two rows instead of one.

This works well for shirts, pants, and shorter items.

It’s one of the most effective closet organization ideas for master bedroom setups, especially if you don’t have a lot of space.

Add Open and Closed Storage Together

A mix of storage styles works best.

Open shelving is great for items you use often. It keeps everything visible.

Closed shelving or cabinet doors help hide clutter.

For example, you might keep everyday shoes on a shoe shelf, while storing seasonal items behind a cabinet door.

This balance improves both function and style.

It’s a key part of modern master bedroom closet ideas.

Create a Small Dressing Area If Space Allows

If you have extra space, consider adding a dressing area.

Even a small setup can make a difference.

You can include:

  • A bench or stool
  • A mirror
  • A small vanity

This turns your closet into more than just storage. It becomes part of your daily routine.

These master bedroom dressing area ideas are especially popular in larger homes.

Keep Shoes and Accessories Organized

Shoes often create the most clutter.

A proper shoe rack or shoe shelf keeps them neat and easy to find.

For accessories, use:

  • A belt rack
  • A tie rack
  • A jewelry drawer

These small additions improve your master closet organization ideas more than you expect.

No more searching for matching items when you’re in a hurry.

Use Light Colors to Open Up the Space

Color affects how your closet feels.

Light shades like white paint make the space look bigger and cleaner.

They also reflect light better, which helps in smaller closets.

This is why many luxury walk-in closet ideas use lighter tones.

Even a simple color change can make your closet feel new.

Think About Lighting Early

Lighting is often added at the end. But it should be planned from the start.

Good lighting helps you see clearly and makes the space feel comfortable.

You can add:

  • Overhead lighting
  • Lights inside shelves
  • Soft lighting near mirrors

A well-lit closet feels more like a dressing room than a storage area.

Make It Match Your Bedroom Style

Your closet is part of your bedroom.

It should feel connected to the overall design.

For example, if your room has a modern look, your closet should follow the same style.

A master bedroom built-in wardrobe with clean lines and simple finishes works well in contemporary spaces.

For a cohesive result, hire a custom cabinetry contractor who can ensure your closet design complements your bedroom perfectly.

Real-Life Example: Why Layout Matters

Imagine two closets.

One has random shelves and mixed storage. You spend time searching for things every morning.

The other has sections, built-ins, and proper lighting. You know exactly where everything is.

Both closets may have the same amount of space. But one feels easier to use.

That’s the power of a good layout.

When to Consider a Full Closet Remodel

Sometimes small changes are not enough.

If your closet feels too cramped or outdated, a master bedroom closet remodel may be the better option.

A remodel allows you to:

  • Redesign the layout
  • Add better storage
  • Improve lighting
  • Upgrade finishes

It’s a chance to create a closet that actually works for your lifestyle.

Final Thoughts

A well-designed closet is not just about storage.

It makes your daily routine smoother. It helps you stay organized. And it improves how your bedroom feels.

The best master bedroom closet ideas focus on:

  • Smart layouts
  • Practical storage
  • Simple, clean design

Once your closet is set up the right way, everything becomes easier.

And that’s something you notice every single day.

FAQs

What color looks best in a master bedroom closet?

Light colors like white or soft neutrals work best because they make the space feel bigger and brighter.

What lighting works best in a master bedroom closet design?

A mix of overhead lighting and soft shelf lighting works best for visibility and comfort.

What shelving design works best in a master bedroom closet?

A mix of open shelving for easy access and closed shelving for hidden storage works best.

How do I mix open and closed storage in a master bedroom closet?

Use open shelves for daily items and closed cabinets for seasonal or less-used items.

Organized Idaho garage with custom cabinets and a homeowner using tools.

How Much Do Custom Garage Cabinets Cost in Idaho?

If you’ve ever looked at your garage and thought, “This space could be so much better,” you’re not alone. Many homeowners in Idaho feel the same way. Tools pile up, storage gets messy, and finding anything becomes a hassle.

That’s where custom cabinets come in.

But the big question is always the same. How much do custom garage cabinets cost in Idaho?

The answer depends on a few key things. Let’s break it down in a simple way so you know exactly what to expect.

In most cases, custom garage cabinets cost in Idaho ranges between:

  • $2,000 to $6,000 for smaller setups
  • $6,000 to $12,000+ for larger or high-end designs

That’s a wide range, I know. But it really comes down to how much storage you need and the type of design you choose.

For example, a basic wall setup with a few cabinets will cost much less than a full garage makeover with tall cabinets, drawers, and overhead storage.

What Affects Custom Garage Cabinet Pricing in Idaho?

Not all garages are the same. That’s why pricing can vary quite a bit.

Here are the main things that impact custom garage cabinet pricing in Idaho.

Size of Your Garage

This is the biggest factor.

A single wall setup costs less. A full garage system with wall mounted cabinets, base cabinets, and overhead cabinets will naturally cost more.

Think of it like this. More space means more materials, more labor, and more cost.

Type of Cabinets You Choose

Different cabinet types come with different price points.

Common options include:

  • Base cabinet for heavy tools
  • Tall cabinet for vertical storage
  • Overhead cabinet for extra space
  • Open shelving for quick access
  • Closed shelving for a cleaner look

A mix of these usually gives the best result, but it also affects the final price.

Material plays a huge role in custom garage storage cost in Idaho.

You’ll usually see options like:

  • Laminate (more affordable)
  • Plywood (mid-range and durable)
  • Solid wood (premium and long-lasting)

For example, custom wood garage cabinets in Idaho will cost more than laminate, but they also last longer and look better over time.

Cabinet Design Style

Design matters more than people think.

You’ll often choose between:

  • Face frame cabinets
  • Frameless cabinet designs

Frameless cabinets usually have a cleaner, modern look. They also give you slightly more usable space inside. But they can cost a bit more depending on the finish and hardware.

Small details can add up quickly.

Things like:

  • Soft close hinge
  • Full extension drawer
  • Premium cabinet hardware
  • Handles and knobs
  • Locking cabinet systems

These features improve usability, but they also increase cost.

Custom Design and Installation

A fully custom garage cabinet design in Idaho will cost more than pre-made options.

Why?

Because everything is built specifically for your space. Measurements are precise. Layout is optimized. And the finish looks more polished.

Installation also adds to the total, especially for complex designs.

Real-Life Example

Let’s make this simple.

A homeowner in Idaho Falls wanted a clean and organized garage. Nothing fancy, just functional storage.

They went with:

  • 3 wall mounted cabinets
  • 1 tall cabinet
  • A small drawer unit

Total cost came out to around $4,500.

Now compare that to another homeowner who wanted a full upgrade. Floor-to-ceiling cabinets, overhead storage, and premium finishes.

That project crossed $10,000.

Same idea. Very different scope.

Are Custom Garage Cabinets Worth It?

Short answer. Yes, for most homeowners.

Here’s why.

Custom cabinets make your garage easier to use. Everything has a place. You don’t waste time searching for tools or equipment.

They also improve how your garage looks. A clean, organized space just feels better to walk into.

And if you ever plan to sell your home, a well-designed garage can actually add value.

Popular Garage Cabinet Styles in Idaho Falls

In areas like Idaho Falls, homeowners usually prefer designs that are both practical and clean.

Some popular choices include:

  • Neutral color cabinets with simple finishes
  • A mix of open shelving and closed shelving
  • Tall cabinets for bulk storage
  • Minimal hardware for a modern look

A lot of people in Idaho are also choosing built-in garage cabinets from Knudson Cabinetry because they look seamless and save space.

Frameless vs Face Frame Cabinets: Cost Difference

This is a common question.

Face frame cabinets are usually slightly more traditional. They can be a bit more affordable depending on the build.

Frameless cabinets offer a modern look and better access inside. They may cost a little more, but many homeowners prefer the clean design.

In the end, the price difference is not huge. It really comes down to style and preference.

Affordable Options Without Compromising Quality

If you’re trying to stay within budget, there are still good options.

You can:

  • Choose laminate instead of solid wood
  • Limit the number of cabinets
  • Skip premium hardware upgrades
  • Focus on essential storage first

Many homeowners start small and expand later. That’s a smart way to manage affordable custom garage cabinets in Idaho.

Final Thoughts

So, how much do custom garage cabinets cost in Idaho?

It depends on your space, your needs, and how far you want to go with the design.

For some, a simple setup under $5,000 works perfectly. For others, a full custom system is worth the higher investment.

The key is planning it right.

When your garage is designed properly, it stops being a messy storage area and becomes a functional part of your home.

FAQs

How much do custom garage cabinets cost in Idaho?

Most projects range between $2,000 and $12,000 depending on size, materials, and design.

Are custom garage cabinets worth the cost in Idaho?

Yes. They improve organization, save time, and can increase home value.

What garage cabinet design style is most popular among Idaho Falls homeowners?

Clean, modern designs with a mix of open and closed storage are very popular.

How does a frameless cabinet design compare in cost to a face frame design in Idaho Falls?

Frameless cabinets may cost slightly more but offer a more modern look and better space usage.

What garage cabinet wood types are available in Idaho Falls and how do they affect cost?

Options include laminate, plywood, and solid wood. Solid wood costs more but offers better durability and appearance.

Before and after garage workshop makeover

10 Garage Workshop Cabinet Ideas

A messy garage can slow you down more than you realize.

You walk in to grab one tool. Five minutes later, you’re still digging through boxes or opening random drawers. Things don’t have a place, and even simple tasks take longer than they should.

Most people think they just need “more storage.” That’s not always the problem. The real issue is not having the right setup.

The good news is, with the right garage workshop cabinet ideas, you can turn even a cluttered space into something clean, organized, and easy to use.

Whether you have a small setup or a full garage workshop, these ideas will help you plan smarter.

Start With Wall-Mounted Garage Cabinets

If your floor is always crowded, this is the first thing to fix.

Garage wall cabinets keep your tools and supplies off the ground. That instantly creates more space to move around.

They work especially well in a single car garage where every inch matters.

For example, instead of stacking paint cans in a corner, you can store them neatly inside cabinets above your workspace. Easy to reach, but not in the way.

This is one of the simplest garage storage cabinet ideas that makes a big difference right away.

A workbench is the center of any garage workshop. But a plain table is not enough.

Add cabinets below it.

This gives you a dedicated place for tools you use often. No more walking back and forth across the garage.

In a two car garage, you can even run a full wall with a workbench and base cabinets. It keeps everything in one zone and improves your workflow.

This is one of those garage workshop cabinet ideas that makes your space feel professional.

Use Tall Cabinets for Large Tools

Some tools just don’t fit in regular cabinets.

Think ladders, shop vacs, or power equipment.

Tall cabinets solve that problem. They use vertical space that usually goes to waste. If you’ve ever leaned a ladder against the wall and had it fall over, you already know why this matters.

Good garage cabinet design always includes a mix of cabinet heights.

Create a Dedicated Tool Storage Cabinet

Small tools are easy to lose.

Screwdrivers, drills, measuring tapes. They end up scattered everywhere.

A garage tool storage cabinet keeps them all in one place.  You can add drawers, dividers, or peg-style inserts inside. This makes it easier to see everything at once.

This is one of the most practical garage tool storage ideas for everyday use.

Mix Open Shelves With Closed Cabinets

Not everything needs to be hidden.

Some items are easier to grab when they’re visible.

A smart setup includes both:

  • Closed cabinets for clutter
  • Open shelves for frequently used items

This balance improves your garage workshop organization without making the space feel cramped.

Plan Cabinets Based on Your Work Style

Think about how you actually use your garage.

Do you fix cars? Build furniture? Do small DIY projects?

Your cabinet setup should match that.

For example:

  • A mechanic may need heavy-duty mechanic garage cabinet ideas with tool drawers
  • A woodworker may need wider cabinets for materials

There’s no one-size-fits-all solution. The best garage cabinet ideas are always based on real usage.

Use Overhead Space for Seasonal Storage

Some items are not used every day.

Holiday decorations, camping gear, or extra supplies can go higher up.

Overhead cabinets or upper shelving free up your main workspace.

This is especially helpful in a detached garage workshop design, where you want to keep the working area clear.

Go for Custom Cabinetry for a Clean Look

Pre-made cabinets can work, but they often leave gaps or wasted space.

That’s where custom cabinetry makes a difference.

With Knudson Cabinetry, cabinets are designed to fit your exact layout.

This means:

  • No awkward gaps
  • Better storage use
  • A cleaner overall look

If you’re planning a full garage remodel, this is worth considering.

Create Zones Inside Your Garage

An organized garage is not just about cabinets. It’s about zones.

For example:

  • One area for tools
  • One for workbench tasks
  • One for storage

Cabinets help define these zones.

In a busy garage workshop, this makes everything easier to find and use.

This approach is one of the most effective garage organization ideas 2026 trends focus on.

10. Keep Everyday Items Easy to Reach

The biggest mistake people make is putting frequently used items too far away.

Keep your daily tools at waist or eye level. Store rarely used items higher or deeper inside cabinets.

For example, if you use a drill every day, it should not be buried behind boxes.

Simple adjustments like this improve your garage workshop organization more than you think.

Why Good Cabinet Design Matters More Than You Think

A well-planned cabinet setup does more than just store things.

It saves time. It reduces stress. It makes your garage a place you actually enjoy using.

The right garage workshop cabinet ideas help you:

  • Find tools faster
  • Keep your space clean
  • Work more efficiently

That’s why planning your garage cabinet design properly is so important.

Thinking About Upgrading Your Garage?

If your garage still feels cluttered no matter how much you clean, the layout might be the problem.

Working with Knudson Cabinetry can help you design cabinets that actually fit your space and your routine.

From smart garage storage cabinet ideas to full custom builds, the goal is simple. Make your garage work better for you.

FAQs

What type of garage cabinet is most durable?

Metal or high-quality plywood cabinets are the most durable for long-term garage use.

Are wall mounted or freestanding cabinets better for a garage workshop?

Wall mounted cabinets save space, while freestanding cabinets offer flexibility.

How many cabinets do I need in a garage workshop?

It depends on your tools and space, but most setups need a mix of wall, base, and tall cabinets.

What is the best way to store power tools in a garage?

Use a garage tool storage cabinet with drawers or dividers to keep tools organized and easy to access.

What cabinets are best for a woodworking shop?

Wide base cabinets and heavy-duty drawers work best for storing tools and materials in a woodworking shop.